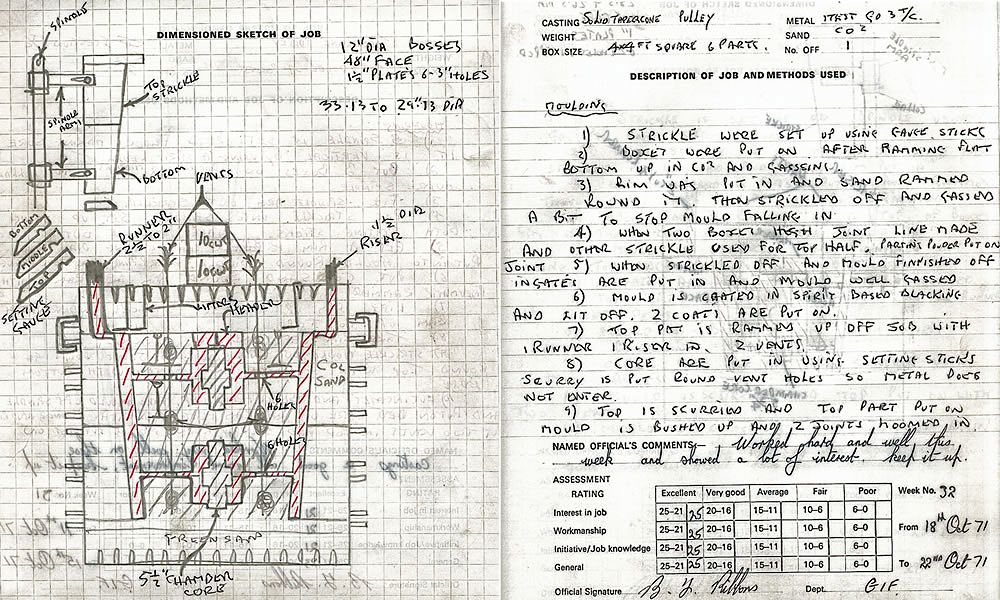
A Strickle job.
Here we have a mould that was created using a strickle in 1971. On the top is the original description I did when an apprentice and underneath a more detailed description with extra drawings and captions of what might be said during the production of this Cast Iron Casting.
I saw Stuart walking from the Managers office.
"Stuart can I have a job?" I asked him.
"I am a bit busy, go into the pattern storeroom and pick one." he replied.
I went in and looked around for something interesting to make, I spotted this strickle job and picked up the tools and went back into the foundry to assess the situation. After a few minutes I knew what I needed to make the mould.
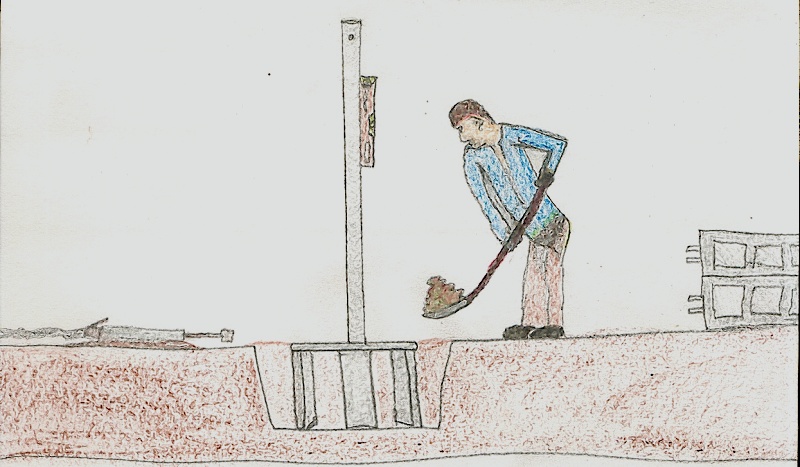
I started digging an hole in the floor close to the wall, when it was the right depth and diameter I went looking for a five foot strickle pole. I shouted Charlie the crane driver to come down to give me a lift with the heavy pole, which I attached to the crane hook. He took it down passed the pulley gang who were beavering away making pulleys and he waited patiently for me to arrive, it was 7.30am in October 1971 and it was bloody cold.
I put the strickle pole in my hole and set it level with a spirit level. Then the area around the pole was filled with greensand and rammed in using a compressed air rammer.
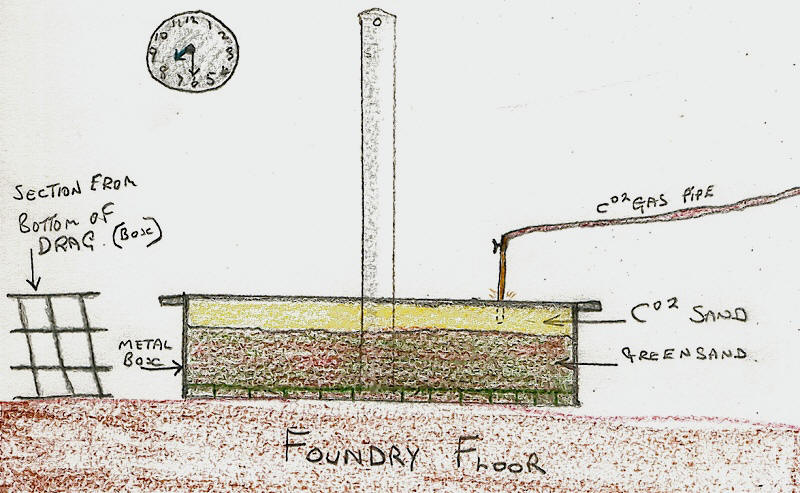
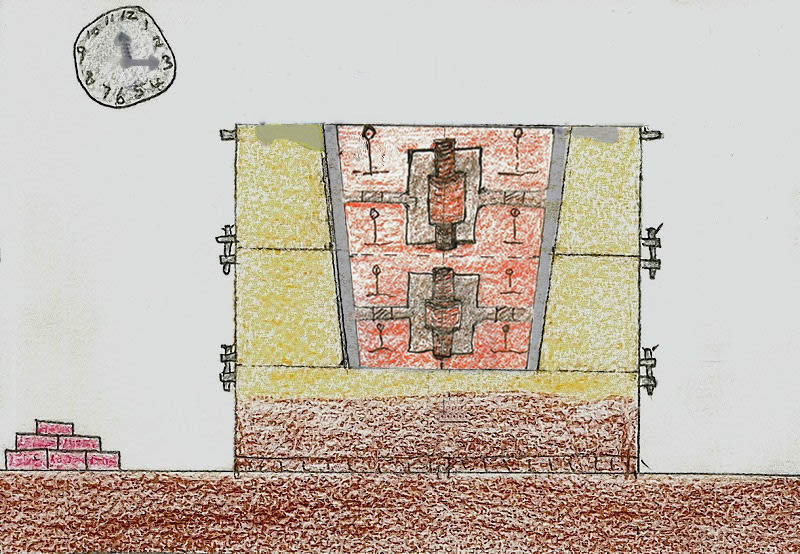
A 4ft square box with bars running across the bottom was positioned centrally over the pole, this would be the drag part of the mould, the box was levelled out on the ground. Then greensand was put in about three inches from the top and rammed using the rammer. Co2 sand was then put on top of the greensand and rammed to the level of the box, this was then strickled flat and gassed for several minutes using a gas pipe to render it hard.
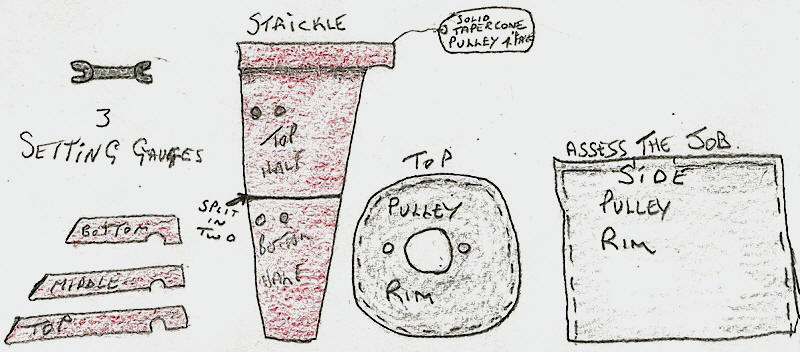
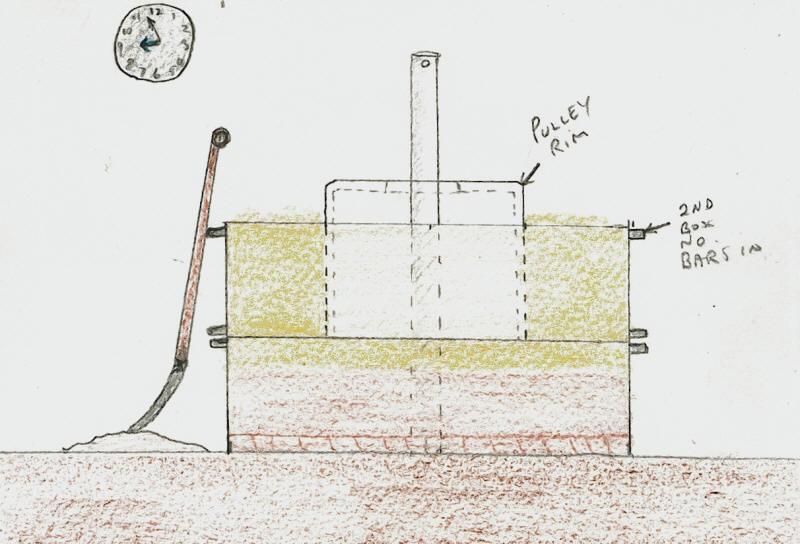
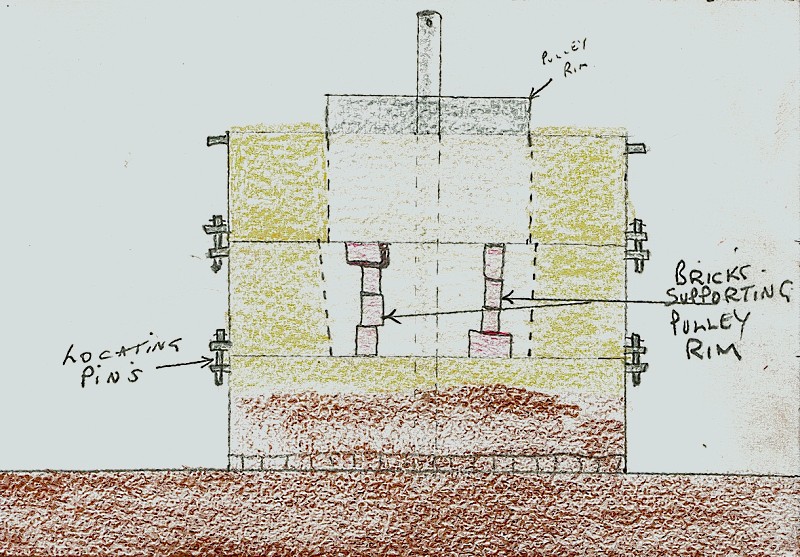
A pulley rim about an inch and half diameter less than the finnished mould size was put over the pole and centralised using a tape measure, a metal box without bars was placed on top of the drag, it was located using pins at both ends, a bit of parting powder was sprinkled on the rim to prevent the sand from sticking to it. Co2 sand was then put in and rammed firmly to the top of the box, the rim was the lifted out and placed to one side. It was now ready for the bottom half of the strickle to be set up and used.
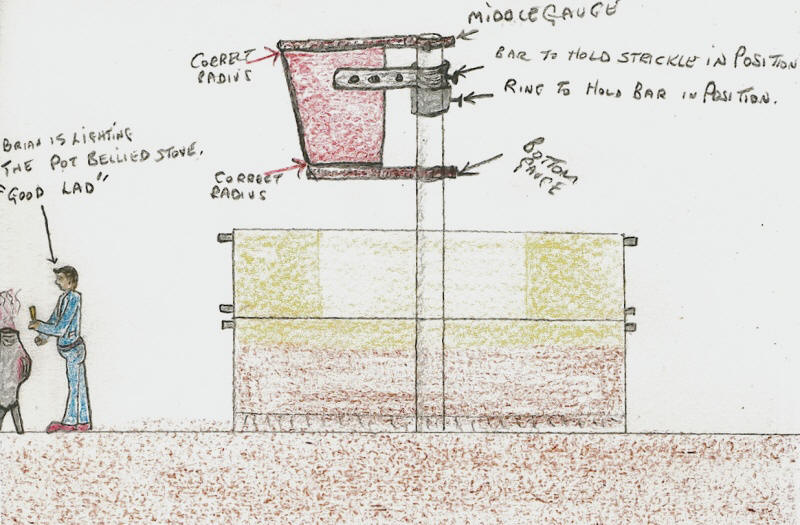
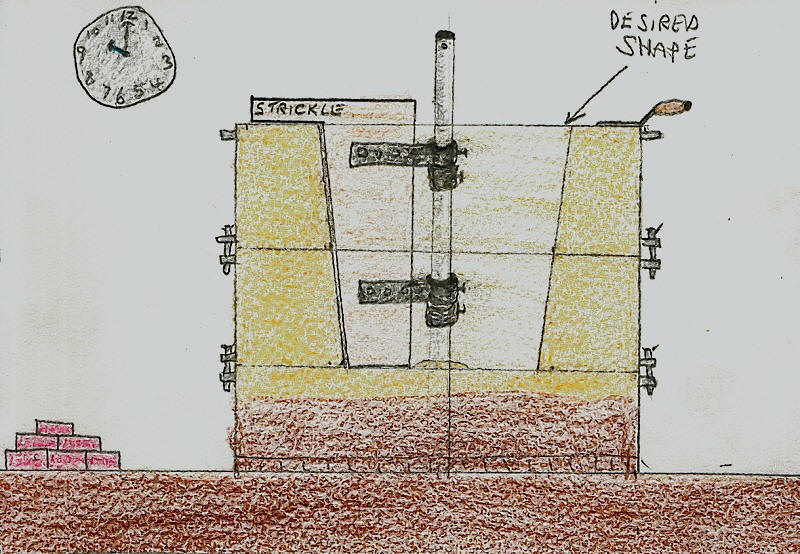
Here we see the pulley rim is out and the bottom strickle is set up, it is lowered down into the mould cutting a way through with your trusty trowel to allow easy access, once on the bottom the strickle is slowly pulled around the mould to create an even round surface, the strickle is then taken out and the Co2 sand is gassed slightly to prevent collapse. The rim is put back in supported by a few building bricks to lift it up for the next level. In the background you can see a fellow moulder lighting the pot bellied stove.
The top half of the mould is done in the same way as underneath shows.
"How much do you want?" asked this rough sounding voice.
I turned around and it was Vic the furnace chargehand.
"Two ton please Vic." I replied.
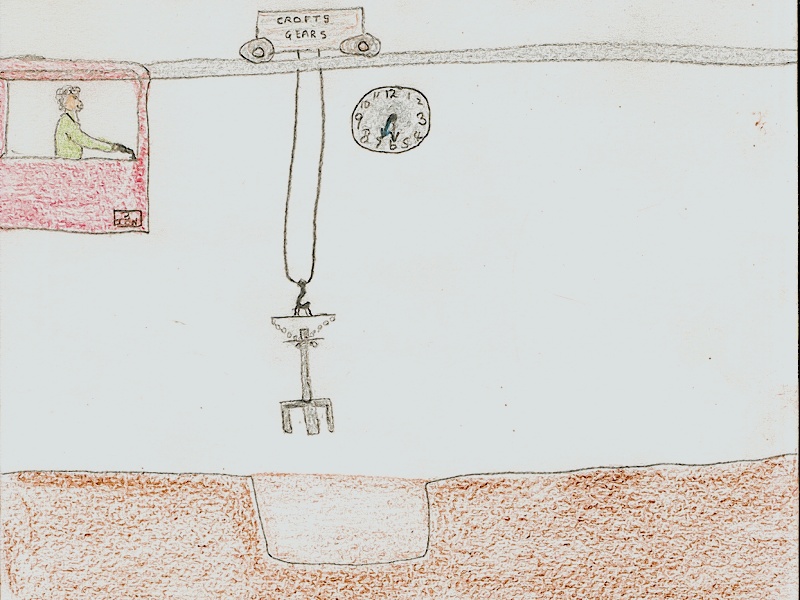
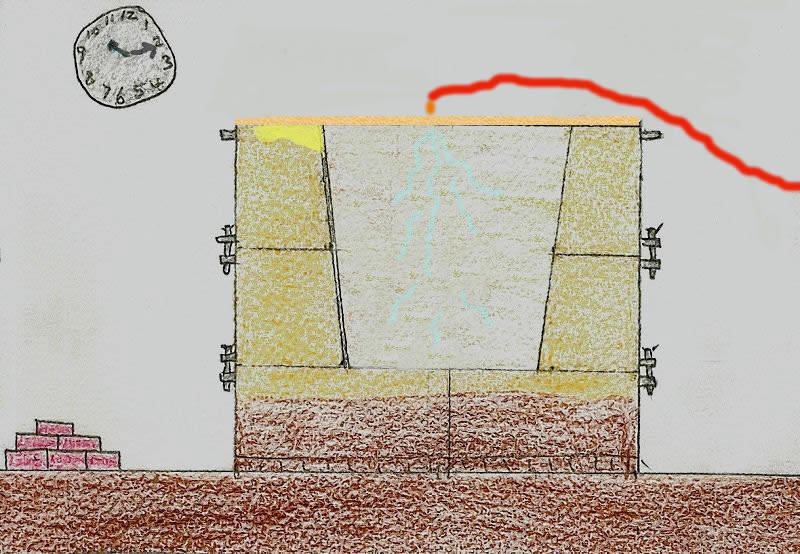
The three boxes were ready for lifting off the spindle. I shouted the crane driver over to lift it off and place it on a bed of smoothe sand.
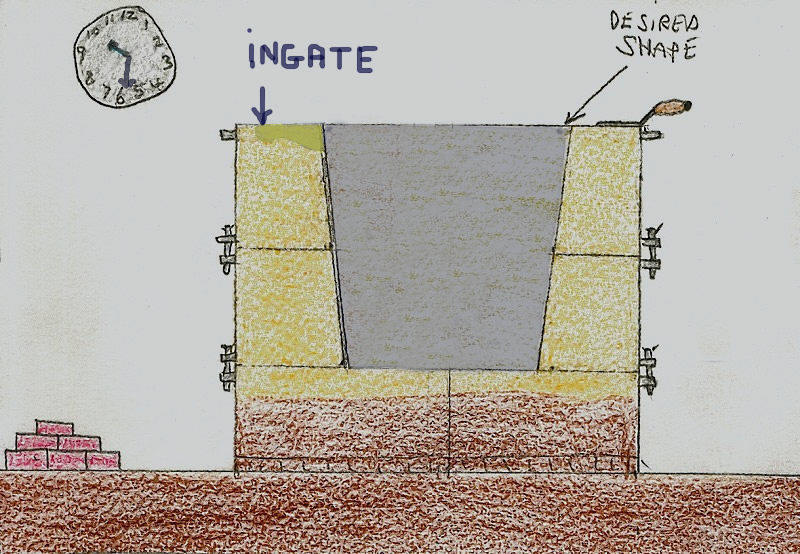
The mould was ready for finishing using normal moulders tools, ingates were put it, the hole at the bottom where the spindle had poked through was filled in, then I placed a four foot gassing board over it and gassed it with Co2.
The mould is rubbed down with sandpaper and painted two coats of plumbago alchohol based blacking, this is to prevent erosion of the mould as the molten iron runs through and solidifies.
I went to the core-shop to find my cores for this job.
"Gordon where is the core for the tapercone pulley?" I asked.
"It is there in front of you." replied Gordon whilst pointing to the core.
I arranged to take it down to my work area to insert into my mould.
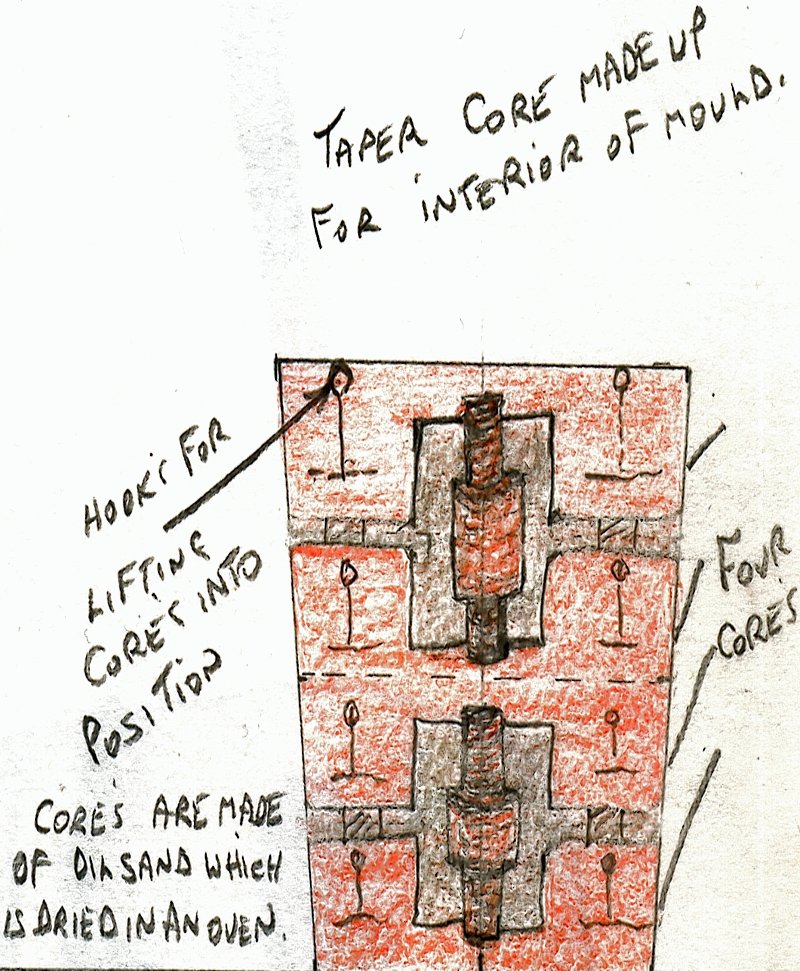
Core is carefully inserted into the mould using lifting hooks and the crane, setting sticks are used to centralise it.
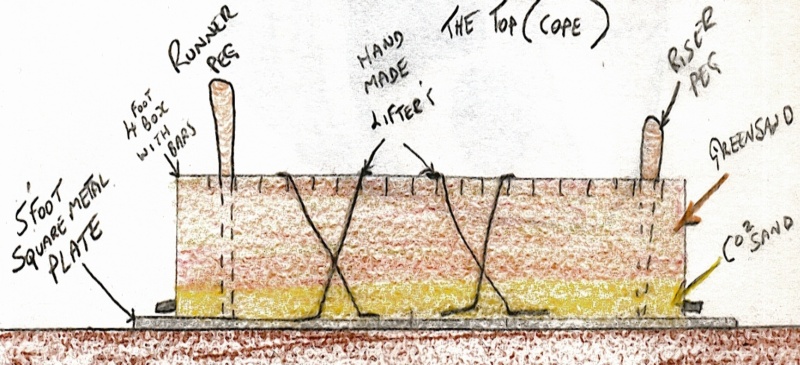
I made the cope using a five foot flat metal plate which I placed a four foot square box with bars in on top of it. A runner and riser were put in position.
After finishing, cleaning and blacking the cope it was lifted using the Crane, it was placed on top of the mould and all boxes clamped or bolted together. Weights were sometimes used, all prevented the pressure of the hot gasses from lifting the boxes.
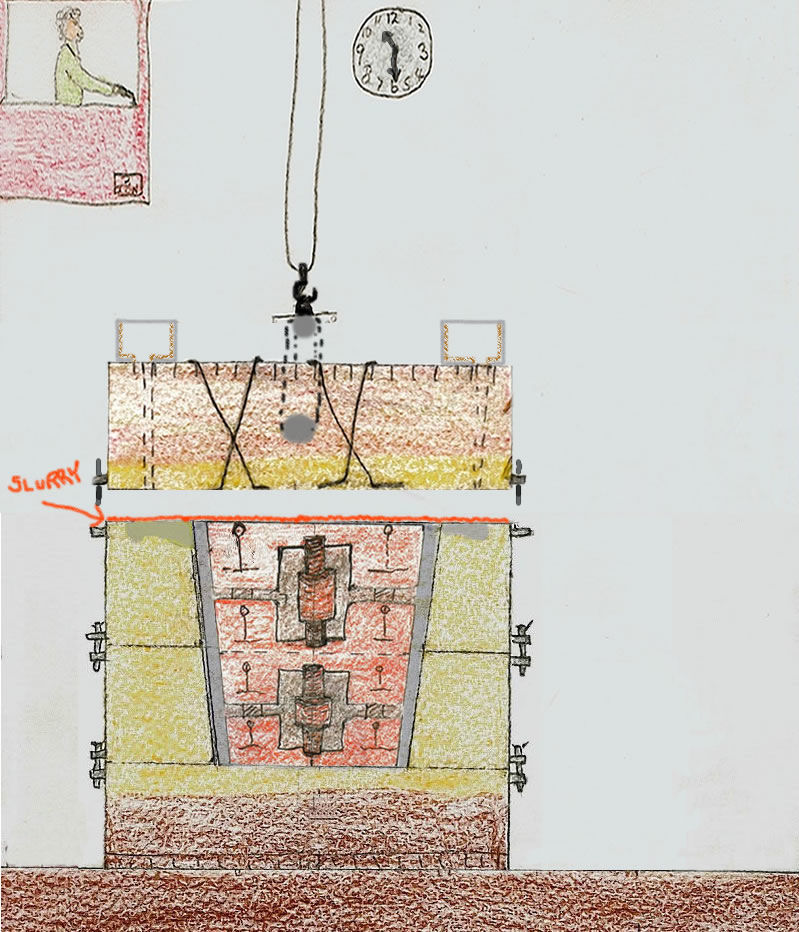
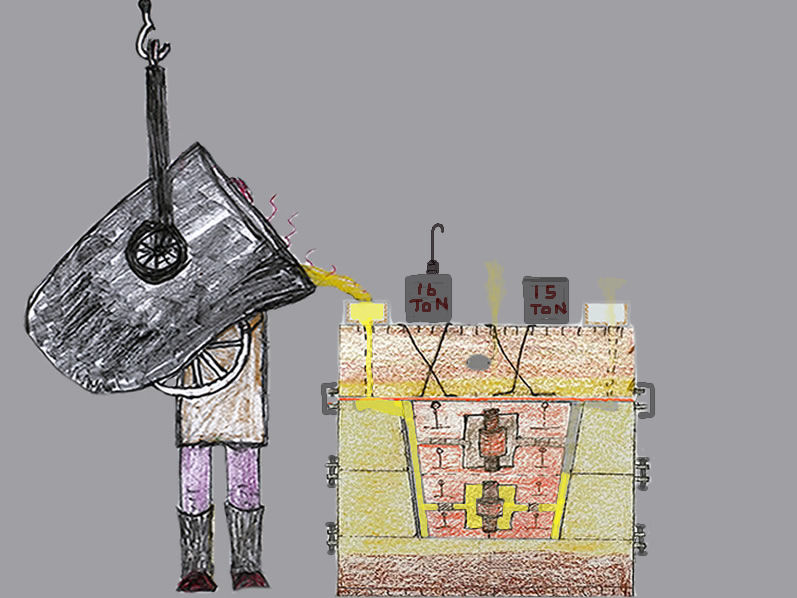
The Mould is cast with molten Cast Iron.
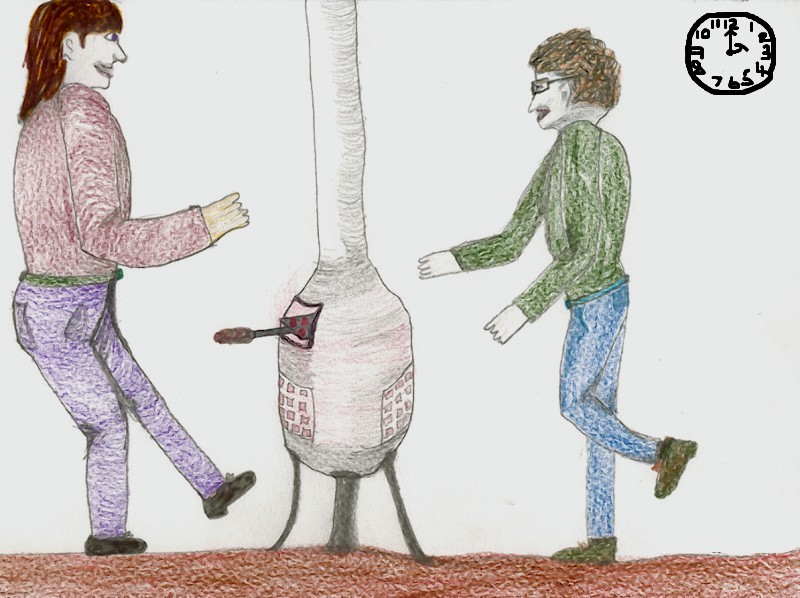
Me and Brian dance around the Pot Bellied Stove eating chestnuts to celebrate the fact it did not leak.
Then I went and got another job to continue my work as a Moulder n Coremaker.